
Introduction to "States"
States let a single design hold several arrangements - a deployed awning, hidden chairs, a van set up for the night. This guide builds your first group and van states from scratch.
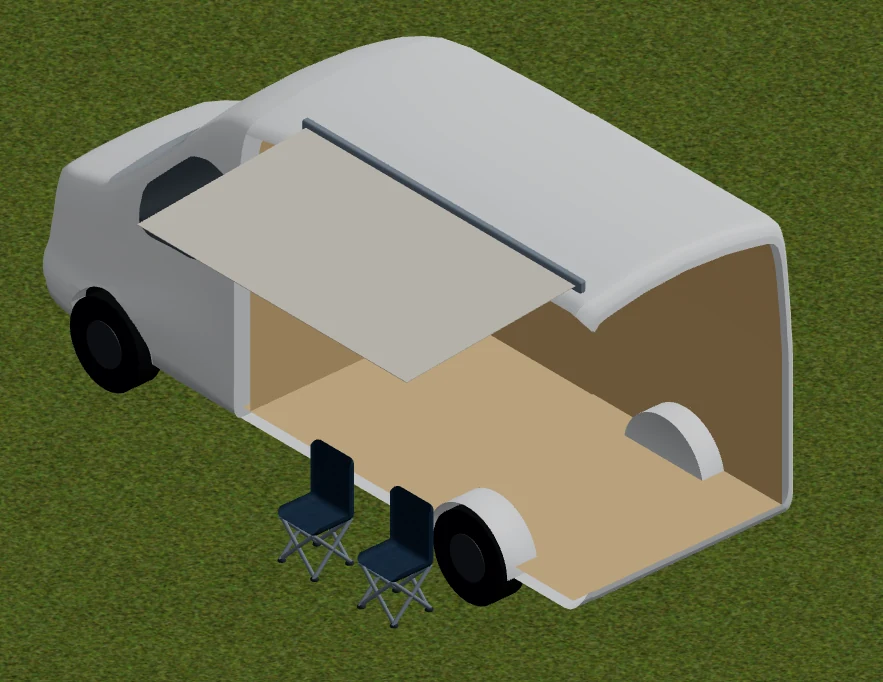
VanCAD is full of powerful features, and one of the main ones is the ability to set group and van states. A state is a saved configuration of an object in your van (states are limited to groups of items) - for example a bed being folded away or ready for sleeping, an awning retracted or deployed, or a table folded down or up. Object states can be configured together to form overall van states (e.g. parked or driving, sleeping or eating).
Imagine a folding bed design. In other editors you’d have to design it either folded away or deployed, but your van isn’t a static environment - things move. States let you flip between multiple different configurations of the same item. So you can configure your bed both with its Base state (the default of every item is called the “Base” state - for a bed, that might be the folded-away version) and other states like “Deployed”.
In this guide we’ll walk you through how to create your first object and van states.
Let’s get started
For this guide, we’ll create an awning on the van’s roof that can deploy its shade, and show some chairs sitting beneath it.
1. Load up a new van in the editor. Add the component Accessories -> Awning. You’ll notice this object is spawned as a Group. It has two objects inside that group: the bar and the shade. You can’t see the shade yet, but that’s because it hasn’t been deployed - that’s what we’re going to set up.
2. Move and rotate the awning bar to the side of the roof, where you would typically see an awning positioned. You can resize its length (blue axis) to get it the right size for your van.
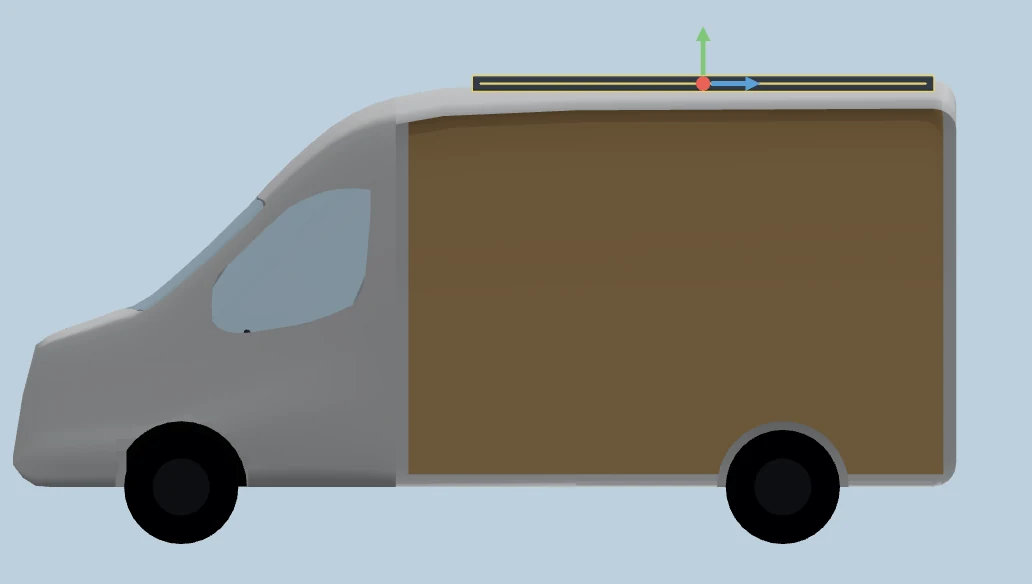
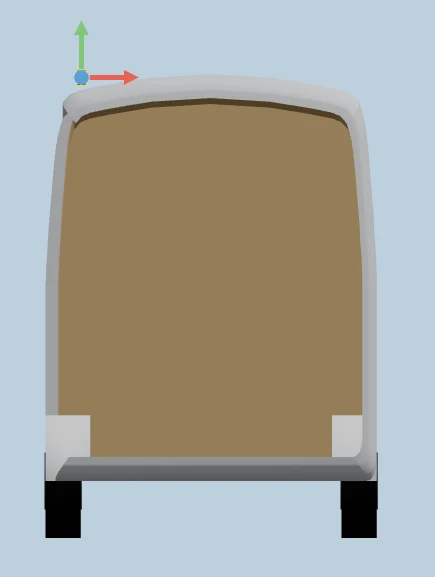
3. Now our awning has been positioned, we can set up the deployed state. Start by clicking the “+ Add” button in the awning group, next to its highlighted “Base” state.
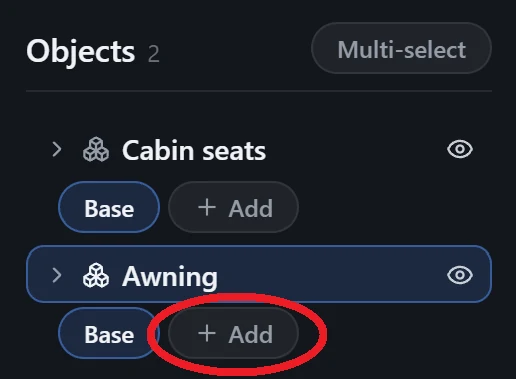
4. We now have a new state called “State 1”. Double-click it to rename it - let’s call it “Deployed”. Press “Enter” after typing to save the name.
5. While we have this state chosen, and the awning group selected, a notice reminds us that we are editing that particular state. Any changes we make to the group or the objects inside it will only apply to this state - the base remains unchanged. Expand the awning group’s items by clicking the “>” arrow to the left of the name, so we can see “Awning Bar” and “Awning Shade”.
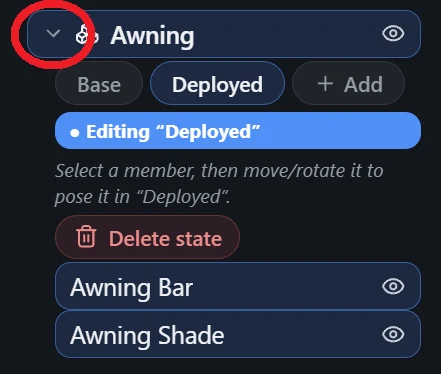
6. When you click on a group in the 3D view, it selects the entire group - clicking again keeps it selected as a whole, so a stray click can never pick up one part of it by mistake. To reach a single item, use the Object List: expand the group and click that item’s own row. Click “Awning Shade” in the list to select only that item - we then get a notice to say we are editing only the shade. (Here the shade is hidden inside the bar anyway, so the list is the only way to it. If you would rather click into a group in the 3D view as well, there is a Click into groups setting under Settings -> Editing.)
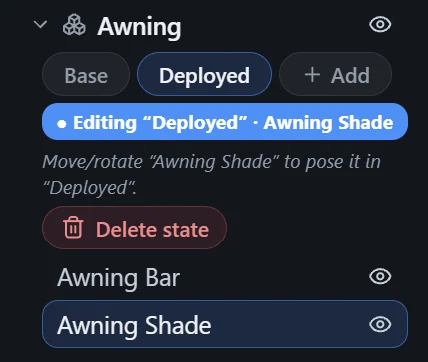
7. You can now see in the editor that only the shade within the bar is selected. We can change its size, position and rotation to give it a new configuration. For an awning, we want to resize the shade to be much larger. Click “Resize” in the Inspector on the right-hand side, then drag the blue arrow outwards to make the shade longer.
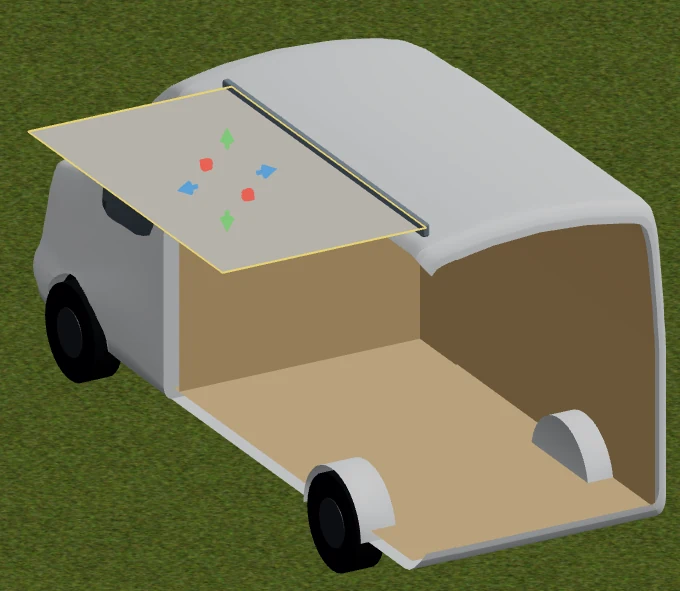
8. The shade is now longer, but an awning is normally angled slightly downward as well. Click the nav cube “Back” face to see the exact angle - orthographic view helps here. Then click “Rotate” and spin the blue axis ring (the circle facing the back) down slightly to give the awning a gentle downward angle.
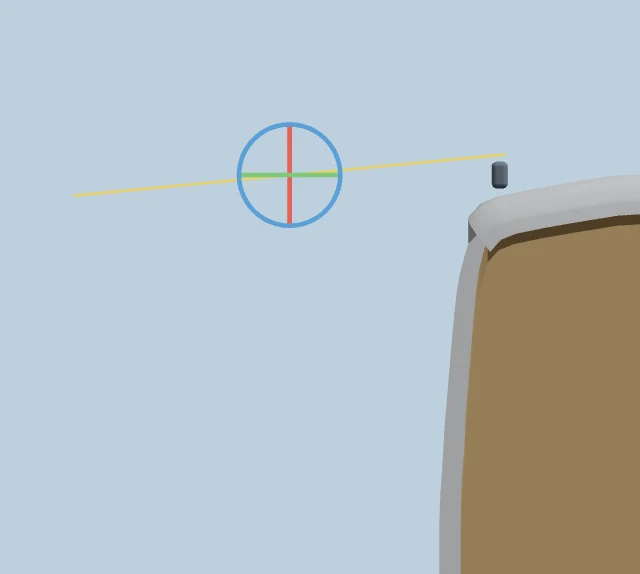
9. Giving it an angle has caused the shade to float above the bar. We need to move it down slightly to put it back. Click “Move”, and drag the upward-pointing arrow down until it looks right again.
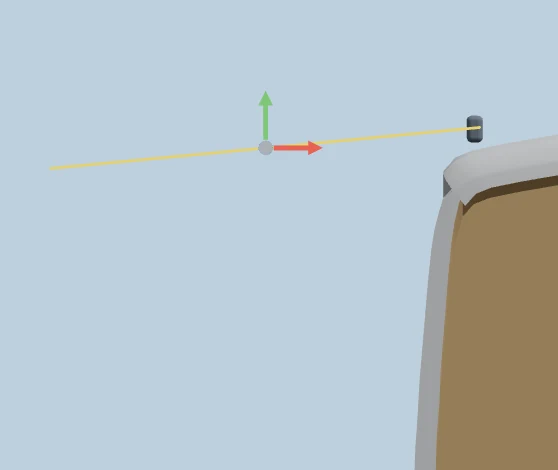
10. The shade is now in the right position for our “Deployed” state. Try clicking between “Base” and “Deployed” to see the awning flip between the two states.
11. While we have the awning deployed, we might also have some chairs outside. Add 2 of the component Furniture -> Camping Chair from the catalogue, and place them below the awning.
12. Only groups can have states, so select both chairs (hold “Shift” and click each one), then click “Group” to create a new group. Rename the group “Outside Chairs”, and expand it to see the two chairs in the Object List.
13. There is an “eye” button on the right-hand side of every object in the Object List. This controls whether it is currently visible, and it keeps this visibility as part of that group state. For the “Base” state, we don’t want to see them, so click it for both chairs and they’ll disappear from the van scene.
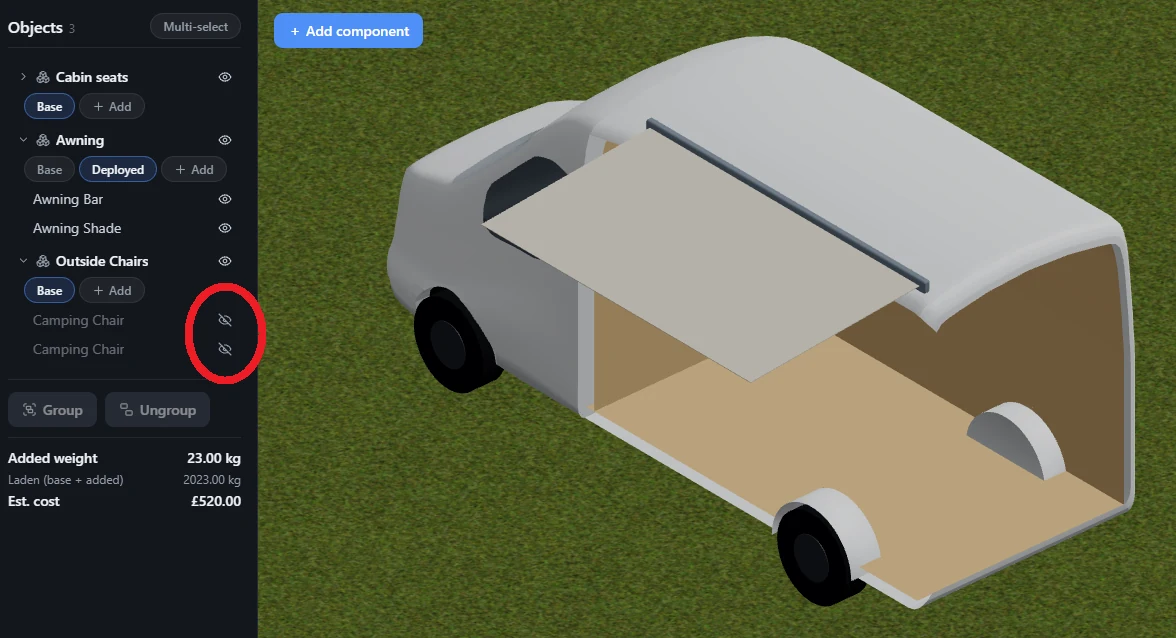
14. Now we can add a new state for this group to bring the visibility back when selected. Like for the awning, click “+ Add” and name the new state “Showing”. The default visibility is to have them visible, so the new state already shows them. Click between “Base” and “Showing” to see the chairs come in and out of view.
15. We now have two different groups with states - the awning and the chairs. We can combine these together into a van state. A van state updates multiple groups together for a specific van configuration. Van states are configured at the bottom of the screen. Press “+ New” in the Van states menu.
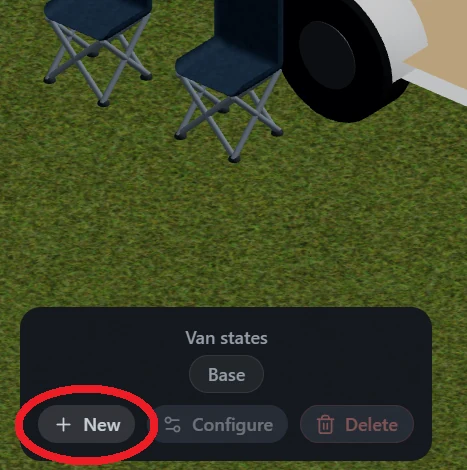
16. Like group states, you can double-click the new “Van state 1” to give it a new name - let’s call it “Outside”. Press your “Enter” key to save the name.
17. We now need to configure this new van state. Click “Configure” to bring up the configuration menu. This shows all the groups with states in our design, and we can choose which states should be enabled for this van state. For our “Outside” state, we want the Awning in “Deployed” and the Outside Chairs in “Showing”, so click both of those. You can then click “Done” to finish.
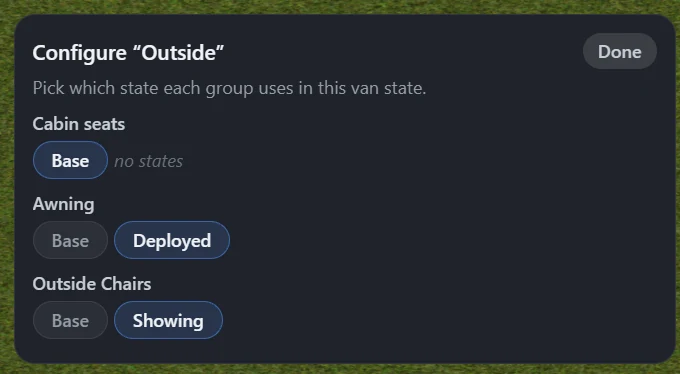
We’re done!
That’s it! We now have a van state that updates multiple groups. Try flicking the van states at the bottom between “Base” and “Outside” - you’ll see the awning and chairs update together. You can use this feature to configure all sorts of parts for your van.
If you are still finding your way around the editor, our guide to planning your camper van layout in 3D covers the placement toolkit these states are built on: moving, rotating and resizing components, snapping them flush to the van, and cutting them to fit.
We hope you found this guide helpful - check out the others, along with the in-app tutorials, to learn more about the powerful features of VanCAD!