
Planning your camper van layout in 3D
Place, move, rotate and resize components in your camper van layout: snapping, exact millimetre steps, and the three settings that cut an object to fit.
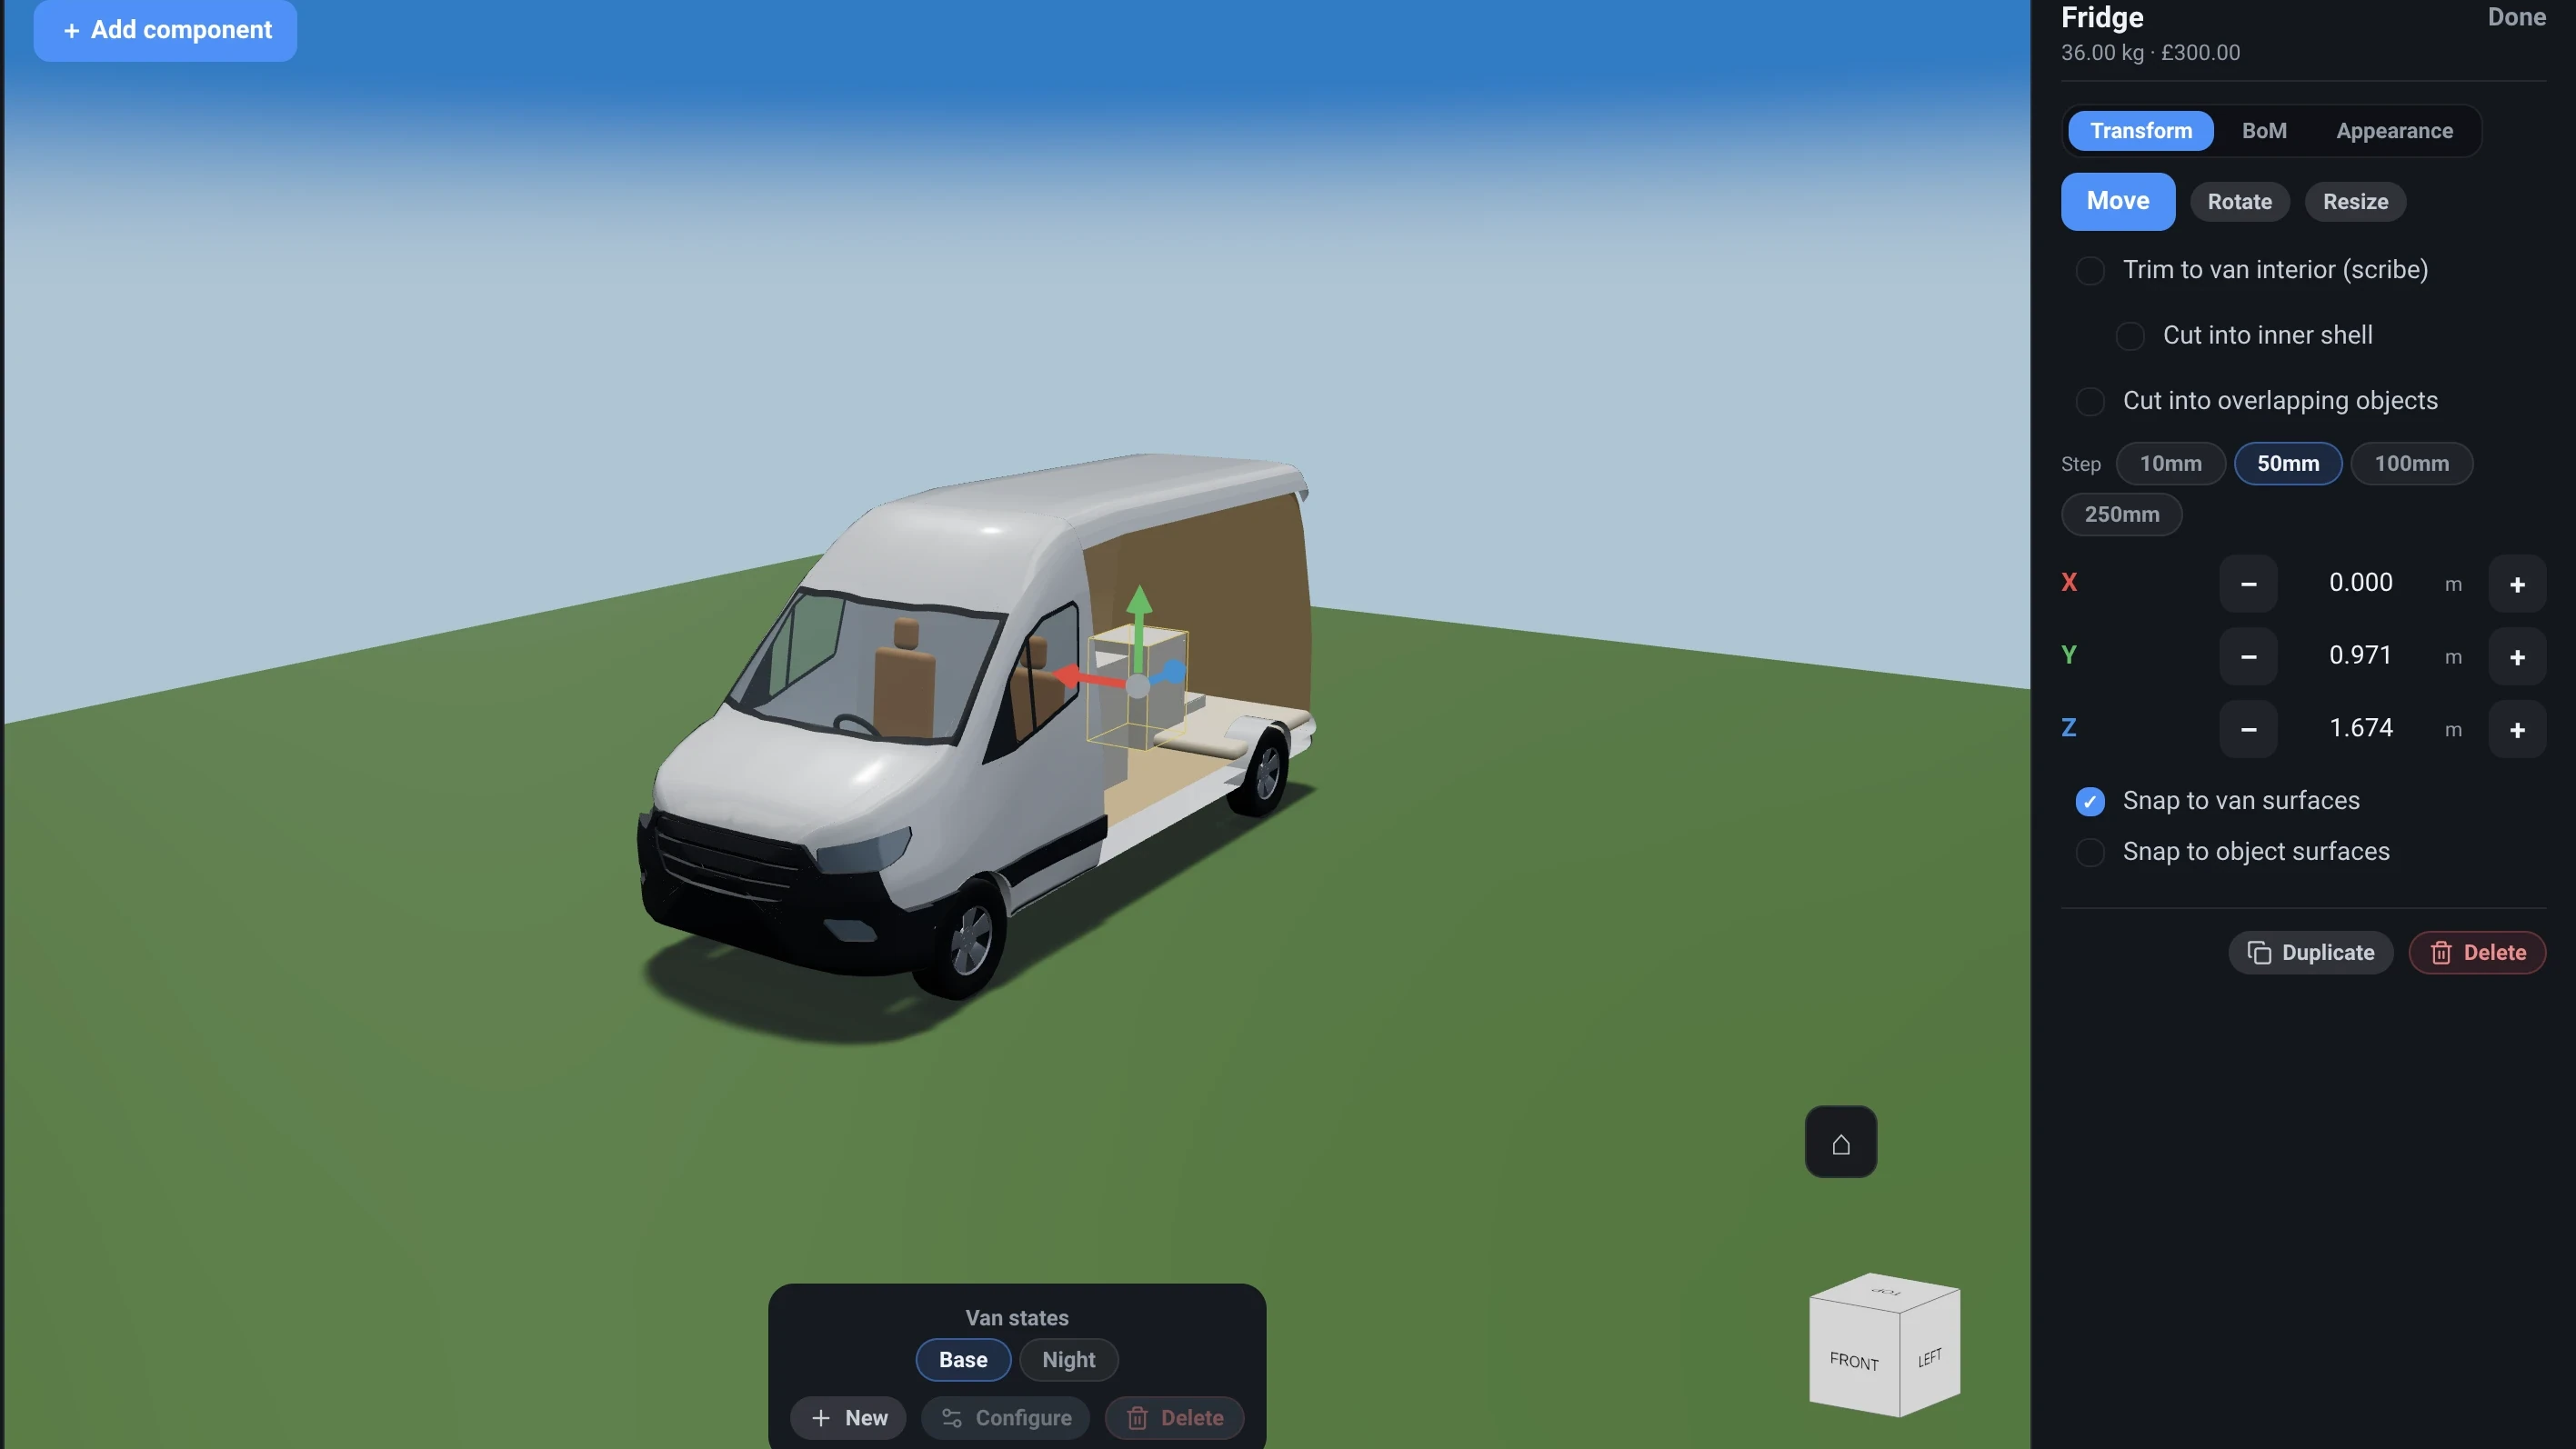
Every camper van conversion starts as a layout: where the bed goes, how much galley you can fit beside it, whether the fridge still leaves room to open the sliding door. VanCAD is full of features built to answer exactly those questions in 3D, against the real shape of your van, before you cut a single sheet of ply.
This guide walks through the whole placement toolkit: adding a component from the catalogue, moving it, rotating it, resizing it, and then using the three fitting settings that make a design look like something you would actually build. It picks up where getting your van ready leaves off, so if you have not chosen a van and opened its shell up yet, start there.
Adding a component from the catalogue
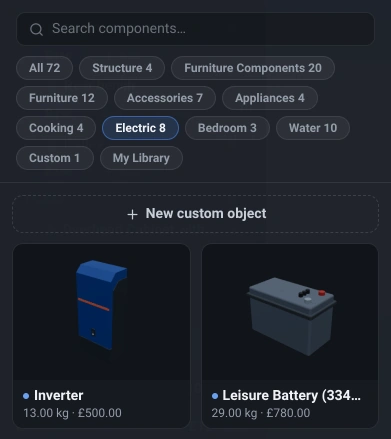
To place a component, open the catalogue with the + Add component button at the top-left corner of the 3D view.

The catalogue is where everything you put in the van comes from: beds, units, countertops, appliances, water tanks, batteries and the raw structural pieces you build fitted furniture out of. Narrow it down with the category chips along the top, or type into the search box if you already know what you are after. Click a card once and the component drops straight into the van, already selected and ready to position.
Moving, rotating and resizing
Once a component is in the van, the Inspector panel down the right-hand side is where you shape it. It appears whenever something is selected, and a freshly placed component selects itself, so it is already waiting for you. To edit something you placed earlier, just click it in the 3D view or pick it out of the Object List on the left.
The Inspector’s Transform page has three tools, chosen by the buttons at the top: Move, Rotate and Resize. Picking one changes both the rows below it and the handles drawn around the object in the 3D view. Throughout, the three axes are the van’s own and are colour-matched to those handles: X (red) runs across the van, Y (green) runs up, and Z (blue) runs along it from the cab to the rear doors.
Move
A new component starts in Move, with three coloured arrows drawn through it. Drag any arrow to slide the object along that axis alone.
There is also a small grey sphere where the arrows meet, and it does something quicker: drag it and the object drops flat onto whatever is under your cursor, resting its underside on that surface and centred where you point. That might be the van’s floor, the top of another unit, or the ground outside. Rotation is left exactly as it was, so a unit you have already lined up stays lined up.
For precision, the X, Y and Z rows underneath let you type an exact position, or nudge
it with the - and + buttons. The Step chips set how far one press moves the object: 10, 50,
100 or 250 mm in metric, or 0.5, 2, 4 and 10 inches if you are working in imperial.
Snapping to walls and to other objects
Real conversions are built flush, and two checkboxes at the bottom of the Move page do that for you while you drag.
Snap to van surfaces is on by default. Bring any face of the object within 5 cm of a van interior surface - a side wall, the floor, the roof, the rear doors or the bulkhead - and it jumps flush against it. It follows the van’s real traced shape rather than a box approximation, so where a wall leans in or a roof is crowned, the object rests on whichever of its corners meets the shell first. That is what stops a corner poking out through a curved wall.
Snap to object surfaces is the same 5 cm snap, but against the other objects in your van, so a box lands squarely on top of a cupboard or flush beside a unit. It works best against flat faces, and it is off by default on purpose: a busy layout has a lot of nearby faces to catch on. Turn it on for the moment you need it, and off again afterwards.
Rotate
Rotate swaps the arrows for three coloured rings, one per axis. Drag a ring to turn the object about that axis, or type an angle into the rows below to set it outright.
Resize
Resize draws six arrows, one per face, along the object’s own axes rather than the van’s. Drag a face and that dimension grows or shrinks while the opposite face stays put, so pulling the front of a countertop forward extends it forward instead of growing it evenly about its middle. The rows below are labelled Width, Height and Depth for the same reason: they belong to the object, so a bench turned to face the side wall still grows along its own width whichever way it is pointing.
Components are parametric, which is the part that matters: resizing changes the shape VanCAD generates, it does not stretch a mesh. A longer countertop stays a countertop with the same edge profile, and a taller cupboard keeps its shelves looking like shelves.
Making things fit: the three cut settings
Below the tool buttons sit three checkboxes, visible whichever tool you are using. This is where a design stops looking like boxes in a van and starts looking polished.
All three are drawing instructions, not changes to the object. Its dimensions, its weight and its cost stay exactly what they were, and so does where it snaps. What changes is how much of it gets drawn. That is deliberate: the panel you buy is a whole panel even after you have cut it to shape, so your bill of materials stays honest.
Trim to van interior (scribe)
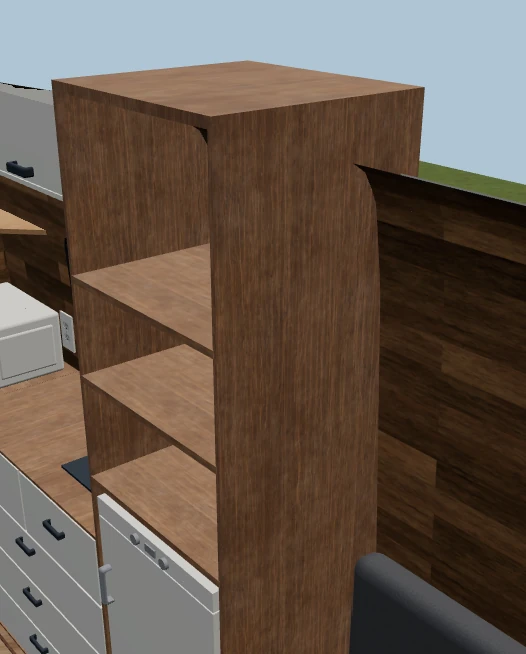
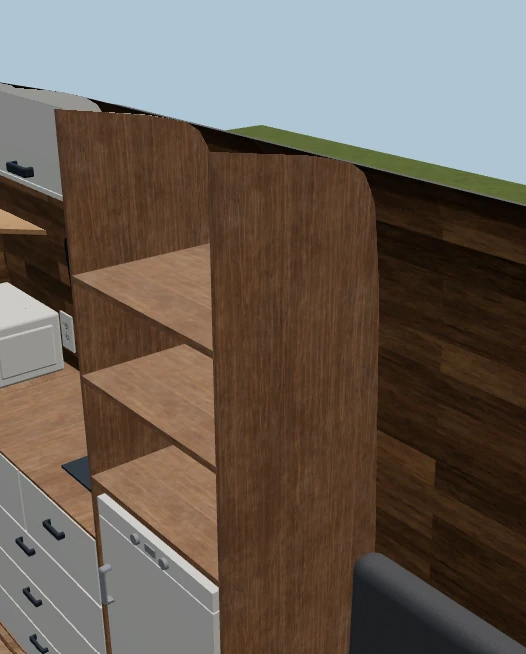
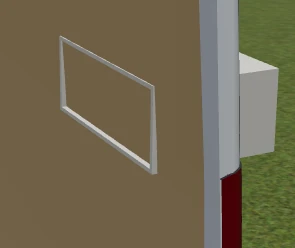
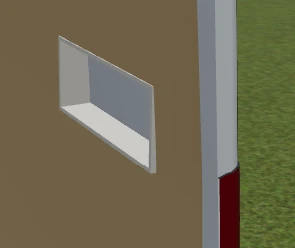
Van walls lean in and van roofs are crowned, so a plain rectangular box will always overlap them somewhere. With Trim to van interior (scribe) ticked, any part of the object sticking out past the inner wall simply stops being drawn - which is exactly what scribing is on a real build: you mark the panel against the surface it has to meet, then cut it to that line.
Anything you place arrives with this already ticked, because a conversion is scribed to fit far more often than it is not. So place the wall, countertop or unit so it covers all of the surface you want it to cover, and nothing is left poking out through the side of your van. Untick it on an object you would rather see whole - the pictures below are the same unit with the option off and on.
Cut into inner shell
Cut into inner shell works in tandem with the trim, and ticking it turns the trim on as well. It lets an object into the cavity between the van’s outer bodywork and its inner lining, which is the ply and insulation you build out. The lining is cut away where the object sits, and the object is trimmed to the bodywork instead.
That is how a real conversion buys itself the last few centimetres. Use it to notch a bed into the wall for extra sleeping length, or to sink a recessed shelf into a shower wall for your toiletries. The gap between the two shells starts at 80 mm at the sides, the roof and the ends, which is roughly what you gain there, and where both walls run parallel you can take it on both sides at once - up to about 160 mm of extra width for a bed across the van. Under the floor the build-up is thinner, about 40 mm, because what sits below it is the van’s own structure rather than cavity. Those thicknesses are settings, not fixtures: set them to your actual build-up in Edit Van Dimensions and the cavity you can borrow from follows.
Your design still stays neat, because the object is trimmed to the outer bodywork: it can reach into the wall build-up, but it can never poke out through the van’s skin.
Cut into overlapping objects
The third checkbox is the only one about other objects rather than about the van. With Cut into overlapping objects ticked, the object carves its own shape out of anything it overlaps.
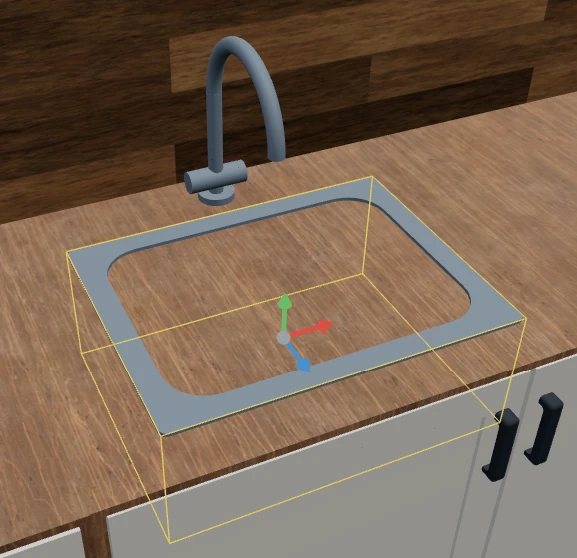
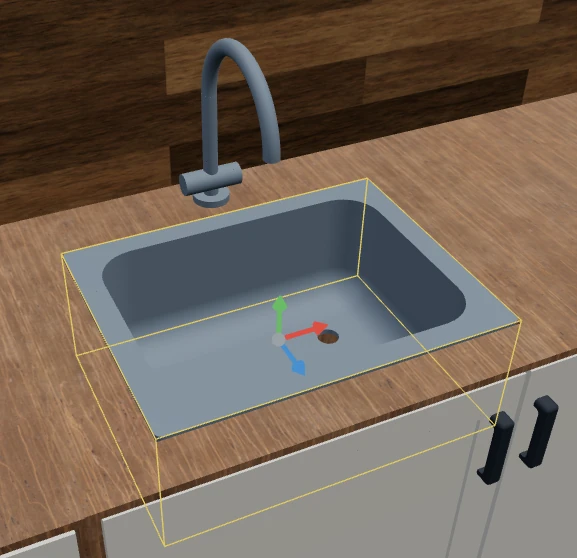
The clearest example is a Sink sitting on a Countertop. You would normally place one overlapping the other, but left to itself the countertop fills the bowl and seals it over. Tick the setting on the sink and its shape takes priority: it cuts through the countertop and opens the bowl up, the way a drop-in sink does in a real build.
A few rules keep the result sensible. The cutter is the object’s own bounding box, an object never cuts itself, hidden objects neither cut nor get cut, and if two overlapping objects both have the setting on, the more recently placed one wins.
Putting it together
That is the whole placement loop: add a component, move it where it goes, turn it to face the right way, size it to the space you actually have, and then let the fitting settings cut it to the van. The bill of materials, the running cost and the added weight all keep themselves up to date behind you, so the layout you are looking at is always one you could order parts for.
Once you have a few pieces placed, the next step is arranging them into things that move together and change between arrangements. Our introduction to states guide builds a deploying awning and a set of camping chairs that appear and disappear with it.
And if you ever want the detail on a single control, turn on Help in the app’s toolbar and click anything on screen. We hope you found this guide useful, and happy building!