
Getting your van ready to start your camper conversion
Set your van up before you design the layout: pick the model, open up the shell, drop the bulkhead, set the sliding door, and finish the walls and floor.
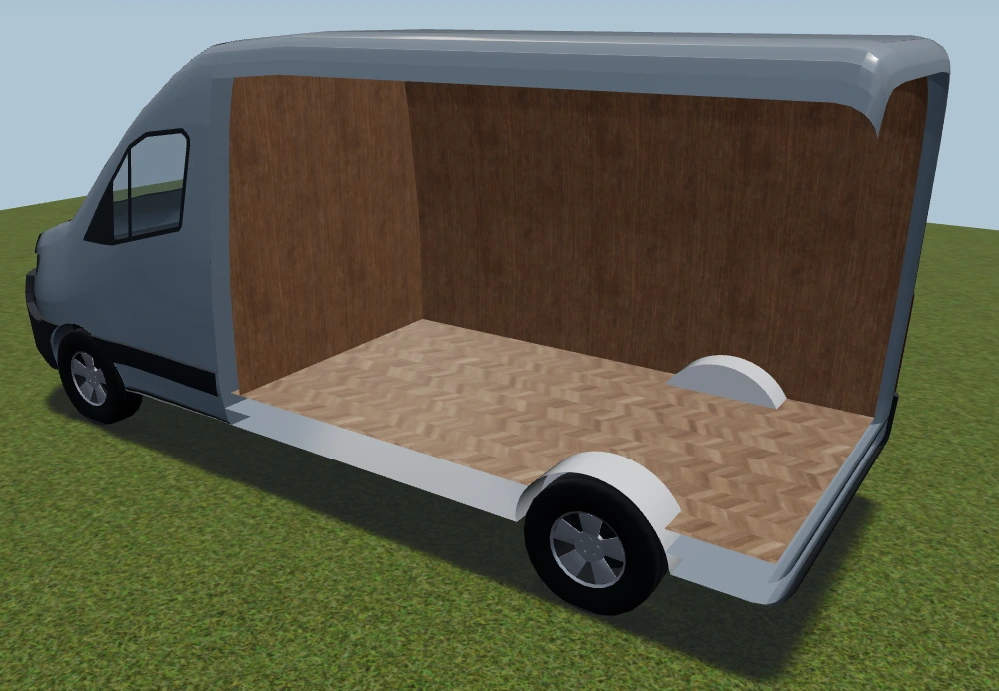
The first part of designing your van conversion is getting your van set up the way you want it. Before a single unit goes in, you want the right base vehicle, the right parts of it drawn, and the walls and floor looking like the ones you are going to build. It takes about two minutes, and everything you set here is saved with your design.
Start with the right van
Load up the app and pick your van out of the picker: first the make and model, then the size, since most vans are sold in several wheelbases and roof heights. Every van in the van library is a traced shape rather than a box, so an L2H2 gets that model’s own roofline, wheel arches and tapering walls, not just its overall dimensions. The rear arches are a starting point rather than a fixture: they are the four numbers on the Wheel arches rows in Edit Van Dimensions, so if you have a tape measure on your own van, put its figures in and every clearance in the design is measured against them.
Pick one and you land in the 3D editor with the van in front of you, already fitted with an inner shell - the ply lining you would build for your floor, walls and ceiling, sitting on the insulation against the bodywork. That is the surface your layout gets built against.
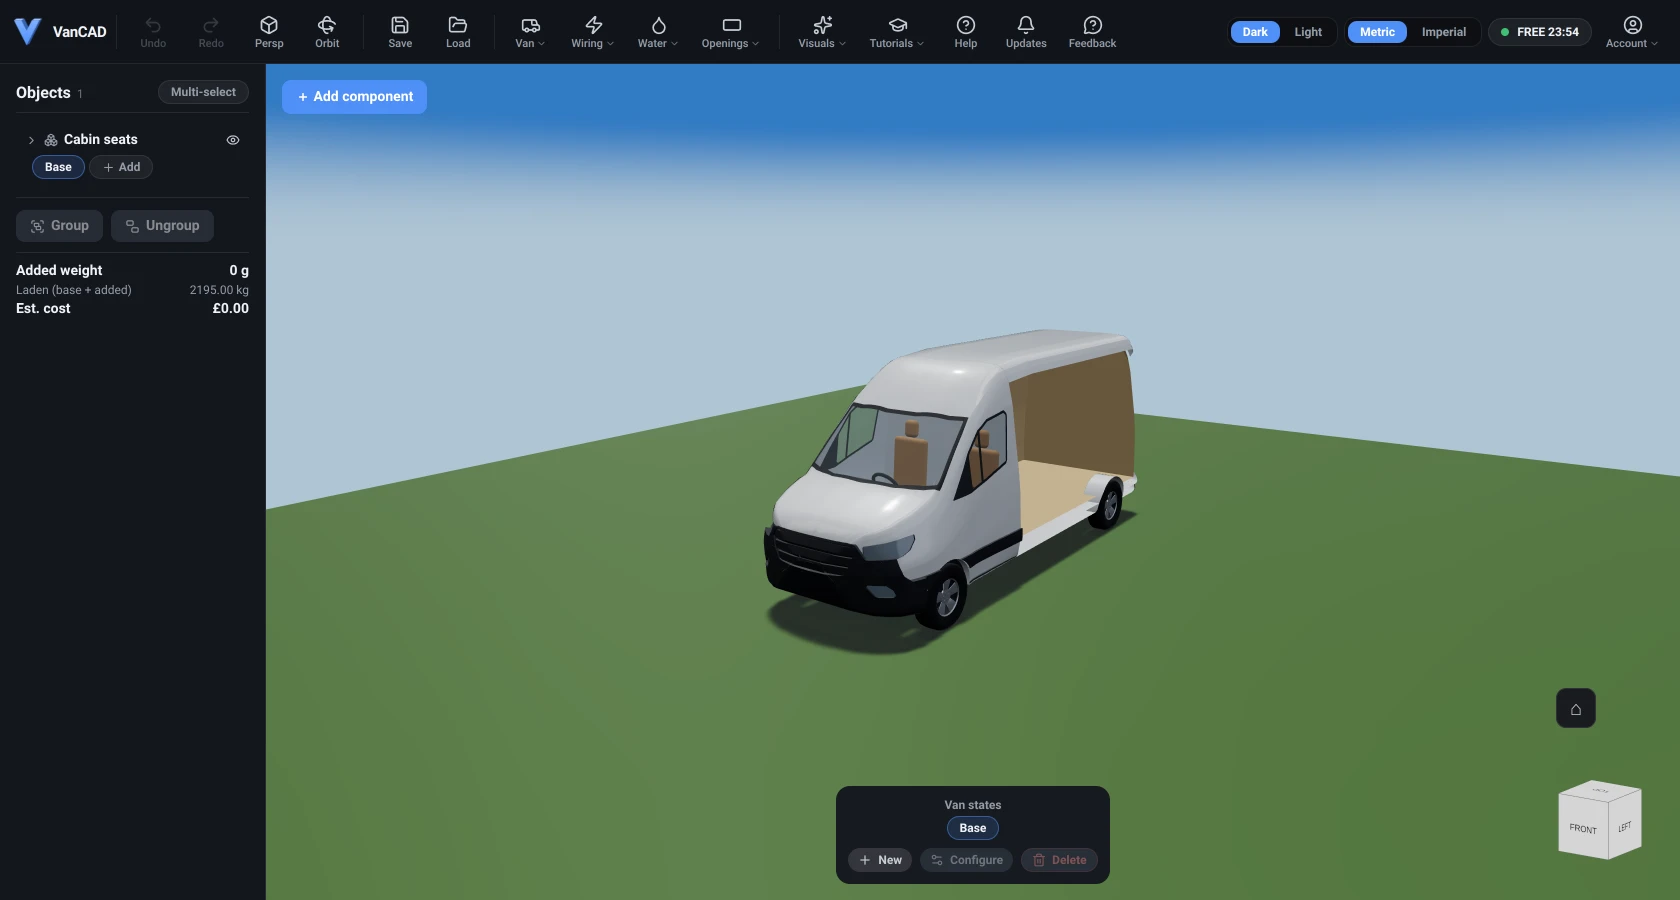
Click and drag anywhere in the 3D view to orbit around the van, and use the scroll wheel to zoom in and out. Right-dragging slides the view sideways, and the navigation cube in the bottom-right corner snaps you to a straight-on Front, Back, Top or Left view when you want to line something up. The Home button just above the cube puts the camera back where it started. There is more on the camera in the reference.
Everything about the van is in one menu
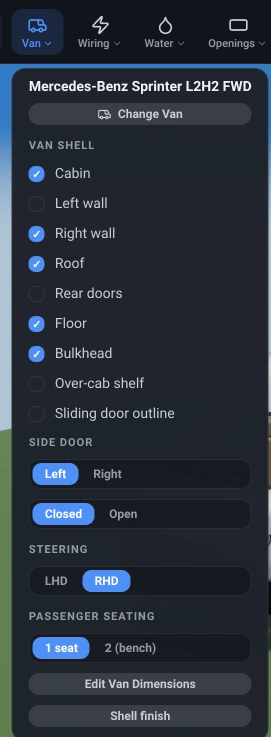
VanCAD lets you customise the van you have chosen so it matches the one on your driveway. Click the Van dropdown in the top toolbar and you get the lot:
Opening the shell up
The Van Shell checkboxes toggle the outer panels of the van: the cabin, each side wall, the roof, the rear doors, the floor and the bulkhead. The inner shell is only ever drawn facing inwards, so from outside you look straight through it - which means unticking a panel opens the van up rather than deleting a wall. A design starts with the left wall and the rear doors unticked, which is the cutaway view you see above.
Tick them all and the van closes up so you can see it as it really looks; untick more of them to reach into a corner you are working on. It changes nothing measurable - no weight, no cost, no dimension - and it is saved with your design, so a design reopens with the same parts hidden.
Dropping the bulkhead
The Bulkhead is the wall between the cab and the load area, and plenty of conversions take it out. Untick the box and it goes, inner face and all, opening the living space through into the cabin. Tick it again and it is back - it is an ordinary undoable change, like everything else in this menu.
The sliding side door
On any van that has a factory sliding door, you can set which side it is on and whether it is drawn Closed or Open. Draw it open while you are planning and you can see the real doorway, at the real aperture width for that model, which is the quickest way to check you have not put a wardrobe across your own entrance.
One thing that catches people out: to see the doorway, that side’s wall has to be showing, and a design opens with the left wall hidden. So if your door is on the left, tick the left wall back on and untick the right wall instead - you then look into the van from the other side, with the doorway in view.
Choosing the finish
Now for the part that makes it look like yours. Click Shell finish at the foot of the Van menu and a panel opens on the right-hand side of the editor, in place of the Inspector.
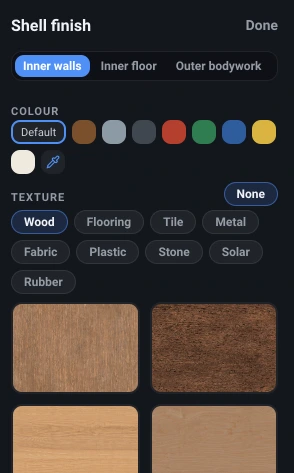
The switch along the top is the whole panel: Inner walls, Inner floor and Outer bodywork, one at a time. The two inner ones take a colour and a material texture, so you can preview birch ply against a dark floor, or wood panelling against herringbone vinyl. The outer bodywork is colour only, because the outside of a van is paint - if you want to change how glossy that paint looks, that is the Paint setting in the Settings menu, under Scene.
Here is a van with wooden walls, a herringbone floor and a grey paint job:
Like the shell checkboxes, this is appearance only: no weight, no cost, no change to any dimension. It is saved with your design and it is undoable, so try a few combinations.
Now go and fill it
That is your van set up: the right vehicle, the shell open where you need to see in, the bulkhead and the door where you want them, and a finish you can live with. From here it is all layout.
The next guide, planning your camper van layout in 3D, walks through placing your first components and fitting them to the van - snapping to the walls, resizing to the space you actually have, and scribing a unit to a curved wall. If you would rather be shown than told, open the Tutorials menu in the app and run Place your first component: it takes you through the same thing with the app pointing at each control as you go.
And whenever you want to know what a single control does, turn on Help in the toolbar and click anything on screen. Happy building.