
Fitting objects
Real conversions are cut to fit: a panel is scribed to a curved wall, a bed is notched into the ribs, a sink drops through a worktop. The three checkboxes on the Inspector’s Transform page do the same to a rectangular object, so the picture matches what you would actually build.
All three are drawing instructions, not changes to the object. Its dimensions, its weight and its cost are exactly what they were, and so is where it snaps - what changes is how much of it is drawn. That is deliberate: the panel you buy is a whole panel even after you have cut it to shape. The one exception is a raw material, whose weight is worked out from its size: trim one to the van and it weighs only the part that is left, though its cost still covers the whole piece.
A fourth checkbox sits beneath them, and it is not about fitting at all: Reference only (ghost) keeps an object in place as a guide to build around.
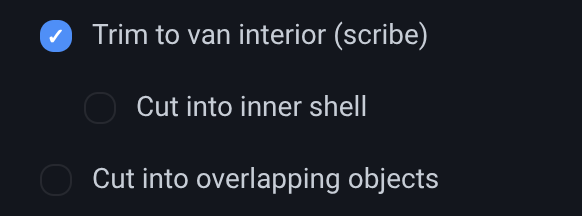
Trim to van interior (scribe)
Section titled “Trim to van interior (scribe)”What it is. The first checkbox, and the one Cut into inner shell builds on. Cut into overlapping objects is independent of it - you can tick either, both or neither.
Anything you place arrives with this already ticked, because a conversion is scribed to fit far more often than it is not. Untick it on an object you would rather see whole.
What it does. Hides any part of the object that sticks out past the van’s inner wall, so a plain box built flush into a curved corner reads as fitting the curve exactly. Scribing is the joinery name for it: you mark a panel against the surface it has to meet and cut it to that line, which is what this does to the drawn object.
Options and limits. On a group it trims every member, each against the shell where it sits. Select a single member and the box shows ticked but greyed out, with a line saying which group it is set on - the setting belongs to the group, so that is where you change it.
The first time you see the trim actually cut something, a tip appears beside this checkbox to say so - once, on this browser.
Move an object completely outside the van and the box unticks itself. Trimming an object that is wholly outside would hide every part of it, which is never what was meant: roof gear - a solar panel, a roof vent - belongs above the shell and nowhere else. So the object stays drawn, the box clears, and it stays clear until you tick it again, even if you bring the object back inside.
The hidden part also stops being clickable, so clicks pass straight through it. That is what lets you select an item inside a trimmed cupboard by clicking where the cupboard’s missing side used to be.
What it affects. The picture only. The object’s size, weight, cost and snapping are unchanged, so your bill of materials still lists a whole panel - except that a raw material weighs only the part left inside the van, and its drawing in the cut list marks the trimmed edges as ones to scribe.
Cut into inner shell
Section titled “Cut into inner shell”What it is. The indented checkbox beneath the trim - a modifier of it, not an independent setting.
What it does. Lets the object into the space between the van’s inner lining and its outer bodywork: the lining is cut away where the object sits, and the object is trimmed to the bodywork instead. This is how a real build notches a bed into the wall for the last few centimetres of sleeping length, or drops a locker into the floor build-up.
Options and limits. The lining starts 80 mm thick at the sides, the roof and the ends, and that is roughly what you gain there. Under the floor it starts at 40 mm, the thickness of the floor build-up: below that is the van’s own sill and crossmembers, which are solid structure rather than space you can build into. Those four thicknesses are yours to set - the Inner shell rows in Edit Van Dimensions - so a thicker lining gives you a deeper pocket here and a thinner one gives you less. Where both walls run parallel you can gain it on both sides at once, so at the default thickness up to about 160 mm of extra width for a bed across the van. Lower down, where the bodywork rolls under, there is less cavity to have, so the gain tapers off.
The object still cannot poke out through the side of the van: it is trimmed to the outer bodywork, so the skin is the limit.
Ticking this turns the trim on as well, and unticking the trim clears this with it - the pair behaves as one three-way setting rather than two independent boxes. On a group it applies to every member, each cutting the lining with its own shape.
What it affects. The picture only, again: the object’s dimensions, weight and cost do not change, and neither does where it snaps. Only what is drawn of the lining, and of the object. A raw material is the exception once more: it weighs what is left inside the bodywork.
Cut into overlapping objects
Section titled “Cut into overlapping objects”What it is. The third checkbox, and the only one about other objects rather than about the van.
What it does. Carves this object’s shape out of anything it overlaps - so a sink set into a worktop reads as an open bowl rather than a box sitting in a sealed slab.
Options and limits. The cutter is the object’s own bounding box, and for a group it is the group’s overall box rather than the members’ individual shapes.
A few rules keep the result sensible:
- An object never cuts itself, and a group never cuts its own members.
- Hidden objects neither cut nor get cut, so hiding a cutter never leaves an orphaned hole behind it.
- If two objects both have this on and they overlap, the more recently placed one wins. They never carve each other.
- The van’s own cab seats are never cut.
What it affects. How the other objects are drawn. This object’s own mesh, weight, cost and snapping are untouched, and so are theirs.
Select a Sink with this switched off and a small card may appear beside the checkbox offering to turn it on. It is a one-off tip rather than a recommendation: sinks are the component most often meant to drop into a worktop, and the switch is easy to miss. Dismissing it, or taking it, stops it returning on this device.
Reference only (ghost)
Section titled “Reference only (ghost)”What it is. The fourth checkbox, beneath the other three. Where they change how an object is drawn, this changes what the object is for: a placement reference rather than part of the build.
What it does. The object is drawn see-through, keeping its own colour, and leaves everything you buy: the bill of materials, the cut list and the weight and cost totals. It keeps everything about where things go - you can still select it, move it, snap other objects to it and measure against it, and it still stops a measurement. The Object List marks it with a dashed square after its name.
Options and limits. The rule fits in one sentence: a reference is left out of what you buy, never out of where things go. One thing follows from it that you might not expect - a reference never cuts into other objects, even with Cut into overlapping objects ticked, because that would change something that is being built. It can still be cut by them.
On a group it applies to every member. Select a single member and the box shows ticked but greyed out, with a line saying which group it is set on.
What it affects. The bill of materials, the cut list and the totals - never the object’s size, position or snapping. The usual reason to reach for it: place a catalogue bench or bed where the finished one will go, make it a reference, and build the real one from raw materials around it.
Related
Section titled “Related”- Move, rotate and resize - these checkboxes live on the same page.
- Snapping - getting the object flush against the wall in the first place.
- Openings - cutting a real hole through the van’s shell, which is a different thing entirely: an opening changes the van, these change what is drawn of an object.