
Drawing an opening
Cutting an opening is a two-part gesture: pick the surface from the toolbar, then draw the shape on it. Picking the surface swings the camera to a locked, straight-on 2D view of that shell, so you are drawing a rectangle on a flat wall rather than fighting perspective, and a panel of exact controls opens beside it.
Openings
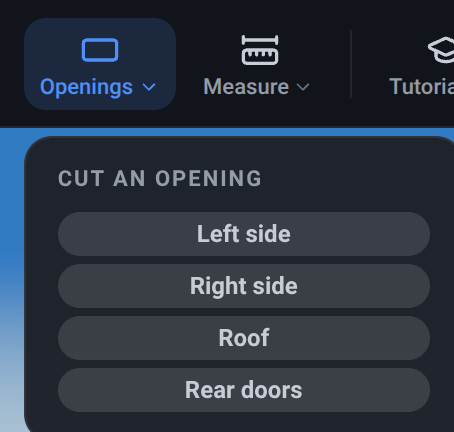
Section titled “Openings”What it is. A toolbar button that opens a short menu of the four surfaces you can cut, under the heading Cut an opening. It is also the tool as a whole - everything below happens after you pick one.
What it does. Picking a surface enters draw mode: the camera snaps to a straight-on orthographic view of that surface with the whole van in frame, camera rotation is locked, and the draw panel appears. Then:
- Draw by dragging a rectangle on the surface.
- Move it by dragging inside it, and resize it with the eight handles on its edges and corners. The handles stay the same size on screen however far you zoom in, so they never swallow a small vent hole.
- Everything snaps to a 10 mm grid. Hold Alt while dragging for fine control.
- Right-drag pans and middle-drag zooms, so you can work close in. The 3D view’s Home button becomes Recentre on surface, which is how you get back if you pan off the van.
- Undo and Redo on the toolbar drive the drawing while you are in this mode, so a stray press that starts a fresh rectangle is recoverable. They do not reach past the draw mode into your design: once the drawing’s own history is empty they simply go grey.
Options and limits. Entering draw mode clears your selection and cancels a wiring or plumbing run you were drawing - one draw tool at a time. It leaves the view exactly as you set it: a wall you have switched off in the Van menu stays off, and the sliding door stays as you left it, because hiding a wall is often how you see the furniture you are siting a window above.
While drawing, the preview is tinted green when the placement is valid and red when it is not, and the panel says why in one line. The guides drawn on the surface show the usable area and any keep-out zones.
The button is on the toolbar next to Water. On a narrow window it moves into the More menu, where it keeps the same four surface buttons. Openings is a building tool, so the demo explorer and the mobile viewer do not have it.
What it affects. Nothing until you press Generate.
Left side
Section titled “Left side”What it is. The first entry in the Openings menu.
What it does. Starts an opening in the left wall of the living area.
Options and limits. The usable area is the wall inside the cargo space, held 60 mm in from every edge, and capped at the shoulder - the height where the wall stops being a wall and starts curving into the roof. Two keep-outs apply on a side wall:
- the wheel arch, plus 30 mm of clearance around it. This covers both the opening cut in the bodywork and the housing standing inside it, so it grows and shrinks with the Wheel arches rows in Edit Van Dimensions;
- the sliding door’s edge, if your door is on this side. An opening must sit wholly on the door or wholly behind it - it may not straddle the join at the door’s rear edge. One drawn on the door belongs to the door: show the door open and the panel stops being drawn, so the window goes with it, leaving a faint outline on the van to mark where it is.
What it affects. Which shell the opening is cut into. A surface cannot be changed afterwards.
Right side
Section titled “Right side”What it is. The second entry.
What it does. Starts an opening in the right wall.
Options and limits. Identical to the left wall, including the shoulder cap, the wheel arch and the sliding-door rule - which applies only if your door is on this side.
What it affects. Which shell the opening is cut into.
What it is. The third entry.
What it does. Starts an opening in the roof - typically an Open hole for a roof fan or vent to sit over.
Options and limits. The usable area is the flatter central band of the roof, inboard of where it curves down into the sides, 60 mm in from the edges, and kept clear of the curve down into the rear doors. There are no wheel arches or doors to avoid, so the roof is the least constrained of the four.
What it affects. Which shell the opening is cut into.
Rear doors
Section titled “Rear doors”What it is. The last entry.
What it does. Starts an opening in the rear doors.
Options and limits. The usable area is inset from the rounded rear corners as well as by the 60 mm margin, so the working rectangle is a little smaller than the doors look. The opening is cut through the rear as one surface; it is not split between the two door leaves.
What it affects. Which shell the opening is cut into.
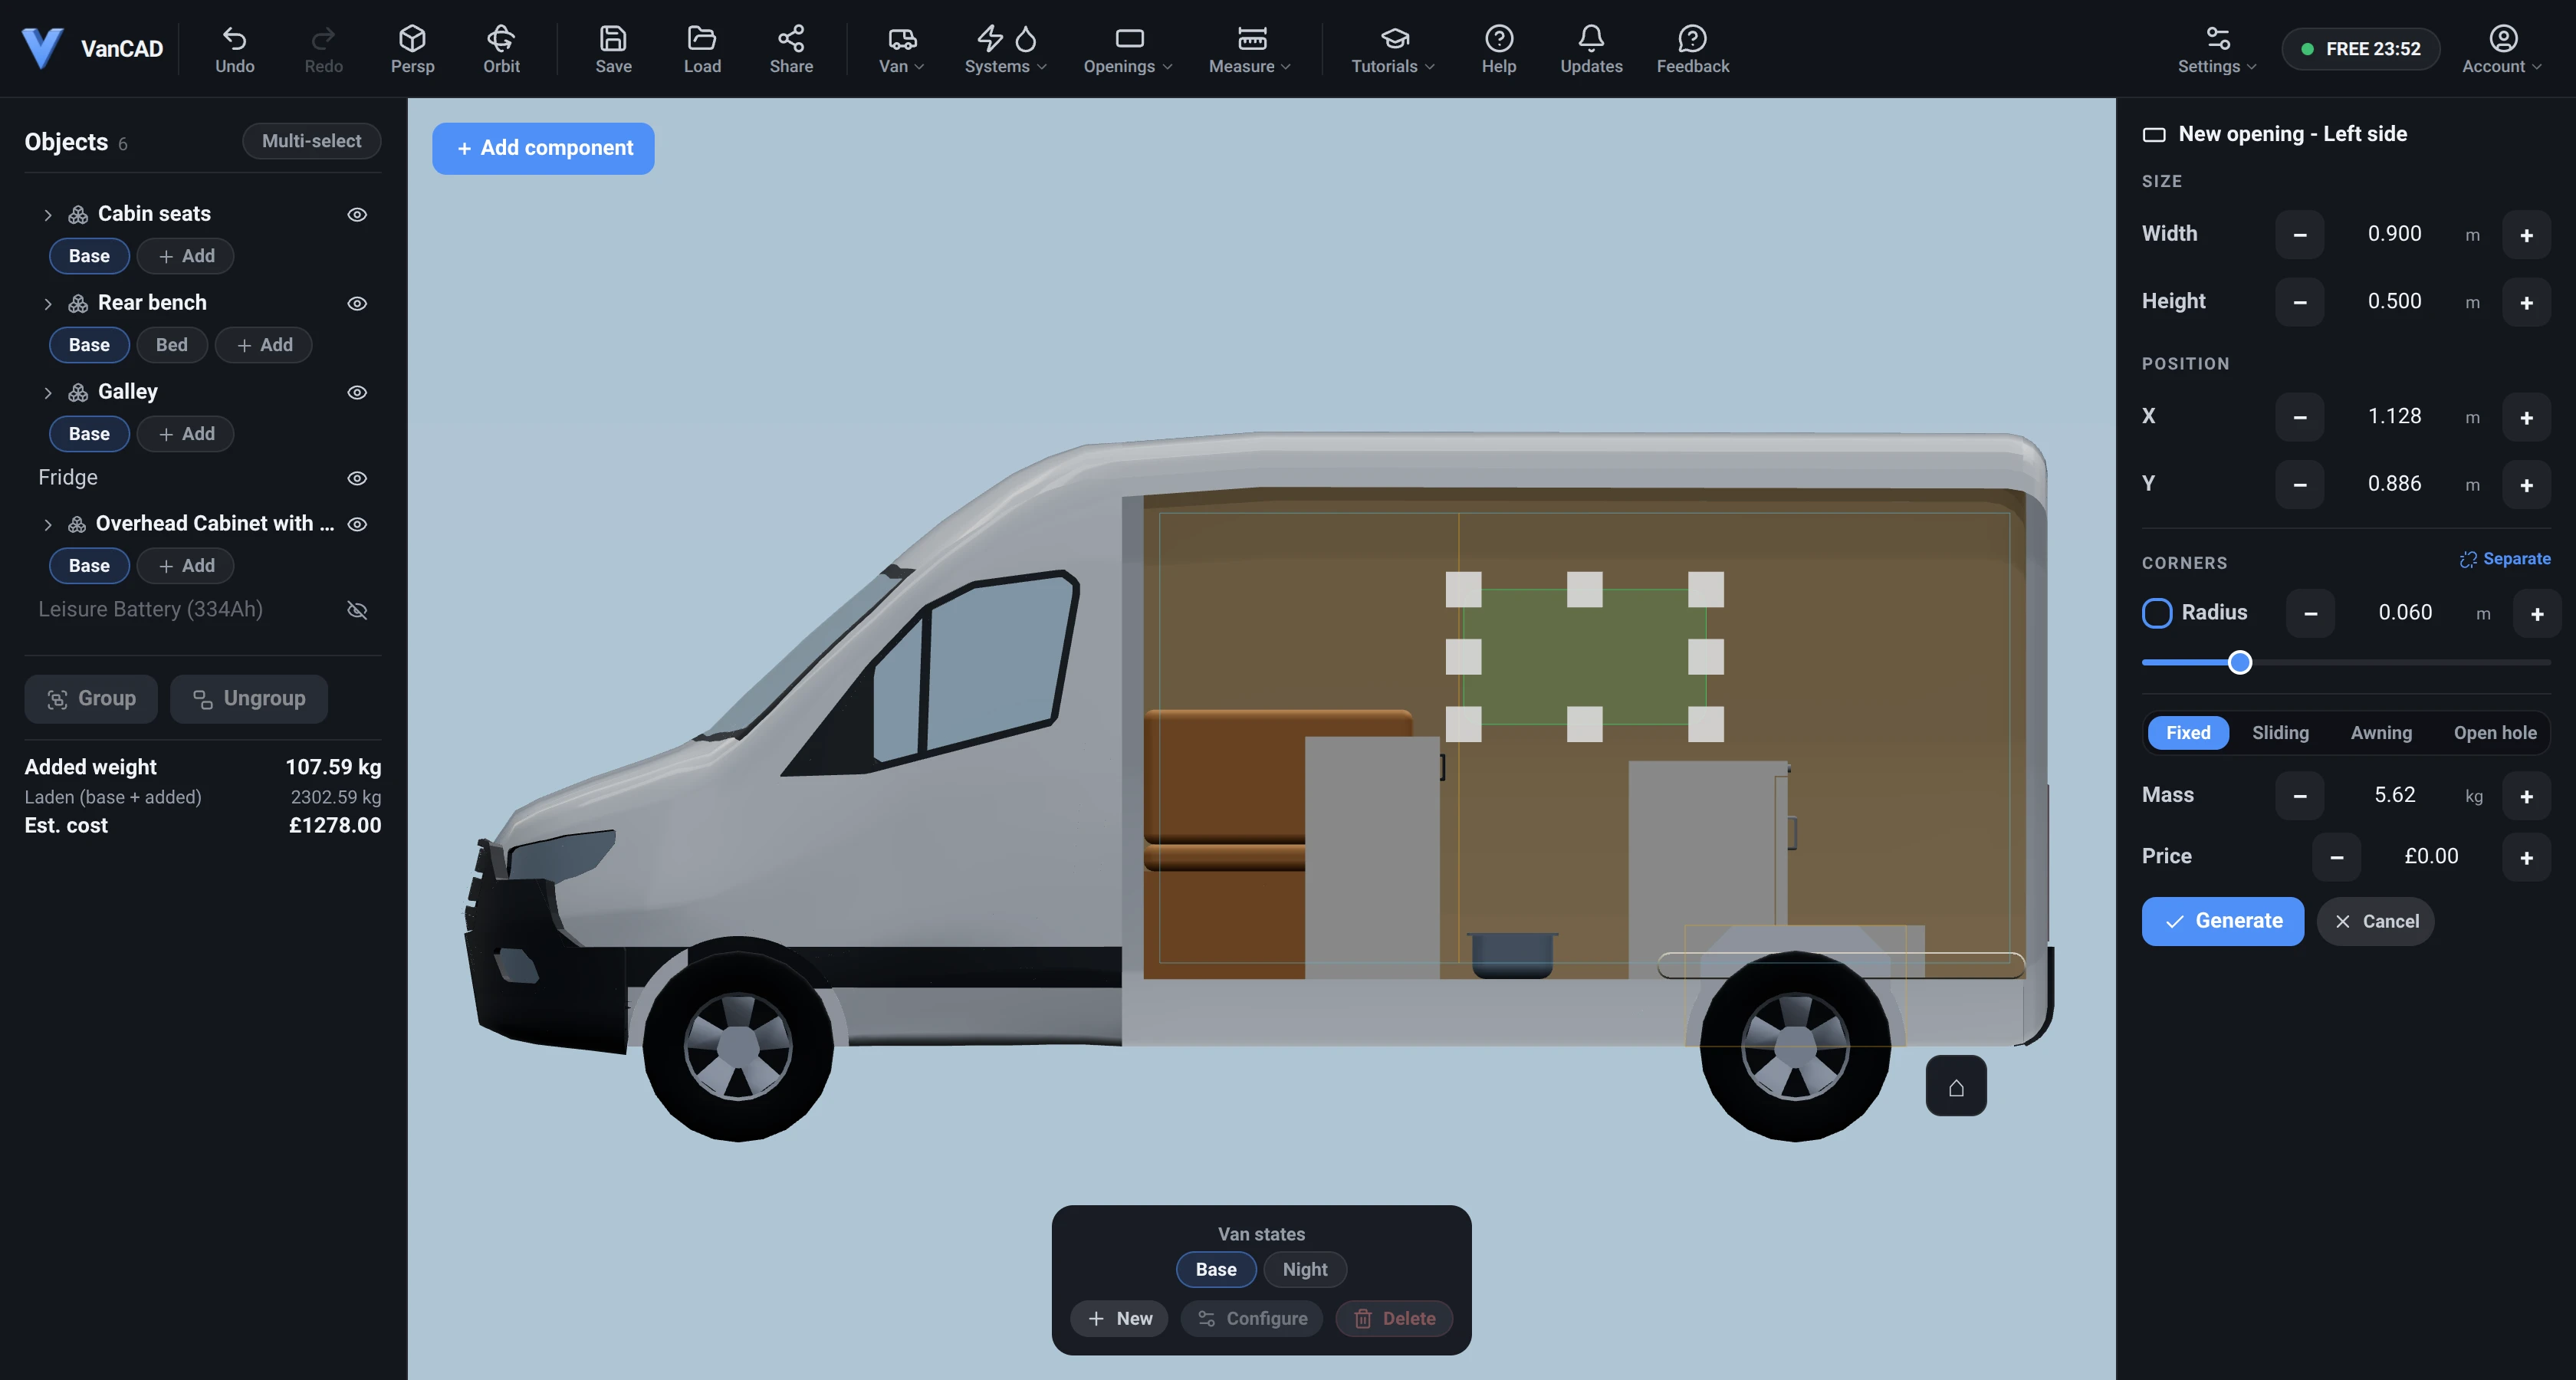
What it is. An editable - value + row under Size, in metres or feet to match your unit
setting. It appears once you have drawn a rectangle.
What it does. Sets the opening’s exact width - useful when you have a window’s real dimensions in front of you.
Options and limits. It resizes about the centre, so the rectangle grows or shrinks evenly and stays where you put it. The steppers move 50 mm at a time; typing takes any figure. An opening must be at least 150 mm on each side, and shrinking one pulls any corner rounding down with it.
What it affects. The aperture, the estimated weight, and whether the placement is still valid.
Height
Section titled “Height”What it is. The row below Width.
What it does. The same, for the other axis.
Options and limits. As Width: centred, 50 mm steps, 150 mm minimum.
What it affects. The aperture, the estimated weight, and the placement’s validity.
Position
Section titled “Position”What it is. Two editable rows, X and Y, under Position.
What it does. Places the opening exactly, measured to its nearest corner from the corner of the surface’s usable area - so 0, 0 is the corner of the area you are allowed to cut in, not the corner of the panel.
Options and limits. On the two walls, X runs front to back from the bulkhead end and Y is height from the floor end. On the rear doors X runs across the van and Y is height. On the roof X runs front to back and Y runs across. Both move in 50 mm steps and keep the opening’s size.
Dragging the rectangle across the surface is not held inside the usable area the way drawing and resizing are, so a moved opening can end up out of bounds - it goes red and Generate greys out until you bring it back. Holding Alt lifts the clamp from drawing and resizing too, so with it held they can go out of bounds the same way.
What it affects. Where the opening sits, and whether the placement is valid.
Linked corners
Section titled “Linked corners”What it is. A small button at the top right of the Corners block. It is captioned with what pressing it does: it reads Separate while the corners are linked, and Link while they are not. Linked is the default.
What it does. Switches between one slider that rounds all four corners together and a row per corner, each with a glyph showing which corner it is - drawn the way you are looking at it, so the mirrored right wall is labelled correctly too.
Options and limits. Coming back from Separate to Link flattens the four corners to a single radius the moment you move the linked slider: it shows the largest of the four, so a mixed set levels up rather than jumping to some arbitrary corner’s value.
What it affects. How many rounding controls are shown. It does not change the rounding on its own.
Corner radius
Section titled “Corner radius”What it is. A - value + row with a slider under it - one row when the corners are linked, four
when they are separate.
What it does. Rounds the corners of the opening, which is what most real camper windows look like.
Options and limits. The value is typed in metres or feet like every other measurement, and the steppers move 10 mm; the slider works in 10 mm increments too. Every corner has the same maximum - half the opening’s shorter side - so the four sliders never move each other, and running one corner to its limit never pins the others. Shrinking the opening re-clamps any radius that no longer fits.
One slider drag is a single undo step, however far you sweep it; typed values and stepper presses each get their own.
What it affects. The shape of the cut, and the frame drawn around it. The weight estimate is worked out from the square-cornered rectangle, so heavy rounding makes it a slight over-estimate.
Opening type
Section titled “Opening type”What it is. A four-way switch: Fixed, Sliding, Awning, Open hole. Fixed is the default.
What it does. Chooses what fills the hole. The first three are glazed windows and get glass you can tint; Open hole is a finished bare hole - the way a roof fan or a vent is really installed, with the unit itself placed over it from the catalogue.
Options and limits. You can switch type freely while drawing, and the estimated weight follows: a sliding window is estimated with two panes where fixed and awning have one, and an open hole carries no glass at all - just its liner - so it reads as almost no added weight.
The type also decides the name the opening is given: glazed types are named Window 1, Window 2 and so on, an open hole Opening 1. Openings do not open and close in the 3D view - a sliding or awning window is drawn shut.
What it affects. What is drawn in the hole, the estimated weight, the name, and which bill-of-materials line the opening lands on.
Generate
Section titled “Generate”What it is. The confirming button at the bottom of the panel. Enter does the same thing.
What it does. Cuts the opening through both the outer bodywork and the inner lining, adds it to your design, leaves draw mode and selects the new opening so its properties panel opens.
Options and limits. It is disabled until the placement is valid, and the reason is shown above it - too small, outside the usable area, overlapping another opening (openings keep 30 mm between them), overlapping the wheel arch, or crossing the sliding-door edge. It is also disabled at the limit of 20 openings in one design, which the panel says in as many words.
Generating is one undoable step. What you cannot do afterwards is resize or move the opening: to change its size or position, delete it and draw a new one.
What it affects. Your design. The opening’s weight and price join the bill of materials immediately.
Cancel
Section titled “Cancel”What it is. The button beside Generate. Escape does the same thing.
What it does. Leaves draw mode without cutting anything. The camera stays where the draw mode left it, but it is unlocked again and your perspective-or-orthographic setting comes back, so the first orbit drag returns you to a normal 3D view.
Options and limits. The rectangle is discarded with no confirmation, and there is nothing to undo - it was never part of your design. Escape is ignored while you are typing in one of the panel’s fields, so it cannot fire mid-edit. A rejected Generate does not cancel: pressing Enter at the twenty-opening limit leaves the rectangle exactly where it was, so you have not lost the work.
What it affects. Nothing.
Related
Section titled “Related”- Opening properties - glass tint, weight and price after the opening exists.
- The van menu - shell visibility and the sliding door, both of which change what you can see while drawing.